I would like to make a Bitcoin Hardware Wallet (HWW) without trusting any single HWW vendor (such as Ledger), and it should also be able to easily handle multisig setups. Ideally, it should run Electrum so that I can be reasonably assured that any wallets managed on this device will be recoverable and exportable in the future.
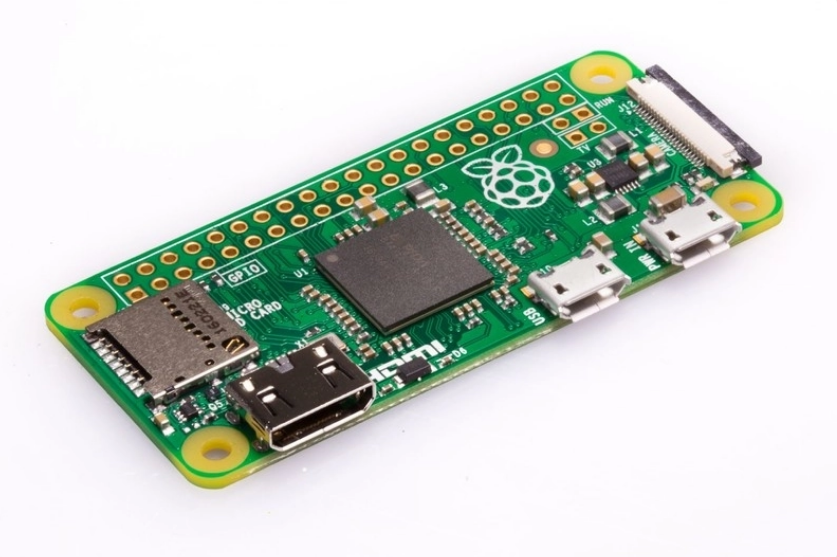
An easy way to do this is with a Raspberry Pi Zero.

Why the Pi Zero?
There are cost advantages to be sure, but the Pi Zero is a bare-bones computer without any networking interfaces. No wireless, no bluetooth, no Ethernet. Unless you install a network interface, the device is already airgapped. The onboard chips are so simple it also minimizes the risk of hardware vulnerabilities you’d get in a laptop or desktop.
It’s also simple to setup!
Prerequisites
You’re going to need more than a Pi Zero for an Electrum-based HWW. In addition to the Pi Zero board itself (not the Pi Zero W), you’ll need the following:
Camera to read QR Codes
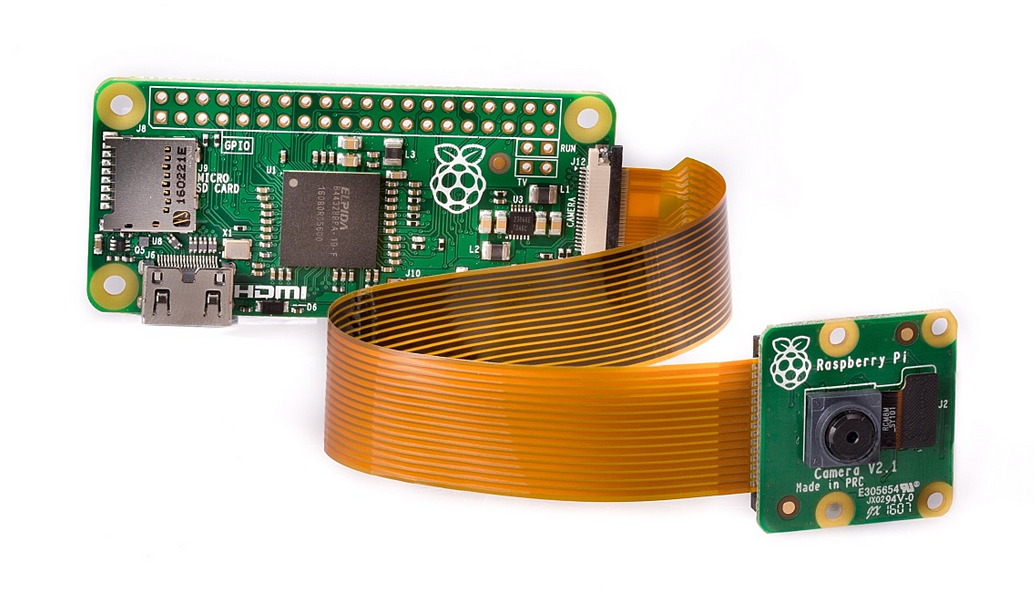
Because the device is airgapped, you’ll want a simple camera to read QR codes via Electrum. This will allow you to read unsigned transactions for signing, as well as loading public keys for multisig wallet creation. You can use an official Raspberry Pi camera. But really, a simple webcam would also work (if USB-based webcam, then obviously you’ll need an adapter to connect it to one of the pi-zero micro-USB ports)

The advantage of a cheap Raspberry Pi camera is that it minimizes the risk hardware vulnerabilities that you might find with full-sized webcams. That said, the simplicity of the Pi camera and the slow processing of the pi-zero makes reading QR codes a bit slow.
Dedicated Display
Because this is an airgapped device, you will need a display. The display must be sufficient for Electrum, and in particular, for showing QR codes that can easily be read by other devices (other HWWs or smartphones).
Any portable monitor will work. The pi-zero has a mini-HDMI port, so you may need an adapter.
Input Device
I recommend a single wired mouse. Most wireless mouse + keyboard setups use an unencrypted wireless frequency and anyone with a cheap receiver in your neighborhood could be listening in on your keystrokes. I recommend a virtual keyboard (more on that later) and a single wired mouse (if USB you’ll need a micro-USB adapter for the pi-zero).
Micro-SD for One-Time Software Load
This is the tricky part. The pi-zero will boot from a micro-SD card. So you’ll need a micro-SD card. And because the pi-zero has no network, you won’t be able to load any software onto the micro-SD card from the pi-zero itself.
Fortunately, there are MANY ways to do this. You could copy the needed files on a USB thumbdrive, but this introduces layer of vulnerability that you can avoid.
I strongly recommend a on-time software load from a separate device (a Raspberry Pi that does have Internet access), and if you ever need new software, you start the process over on a new micro-SD (and destroy the old one). See below for instructions.
If you don’t already have a spare Raspberry Pi with a network interface, you’ll need one (or modify this approach to use a USB drive if you’re okay with those risks). You can use a Raspberry Pi Zero W, or even a Pi4; you’ll only need to use it once for the initial setup (see below).
Initial Setup
You should have a Raspberry Pi Zero with a camera, display, and a wired mouse. You should also have a spare Raspberry Pi that has network access. And you should have one micro-SD card ready.
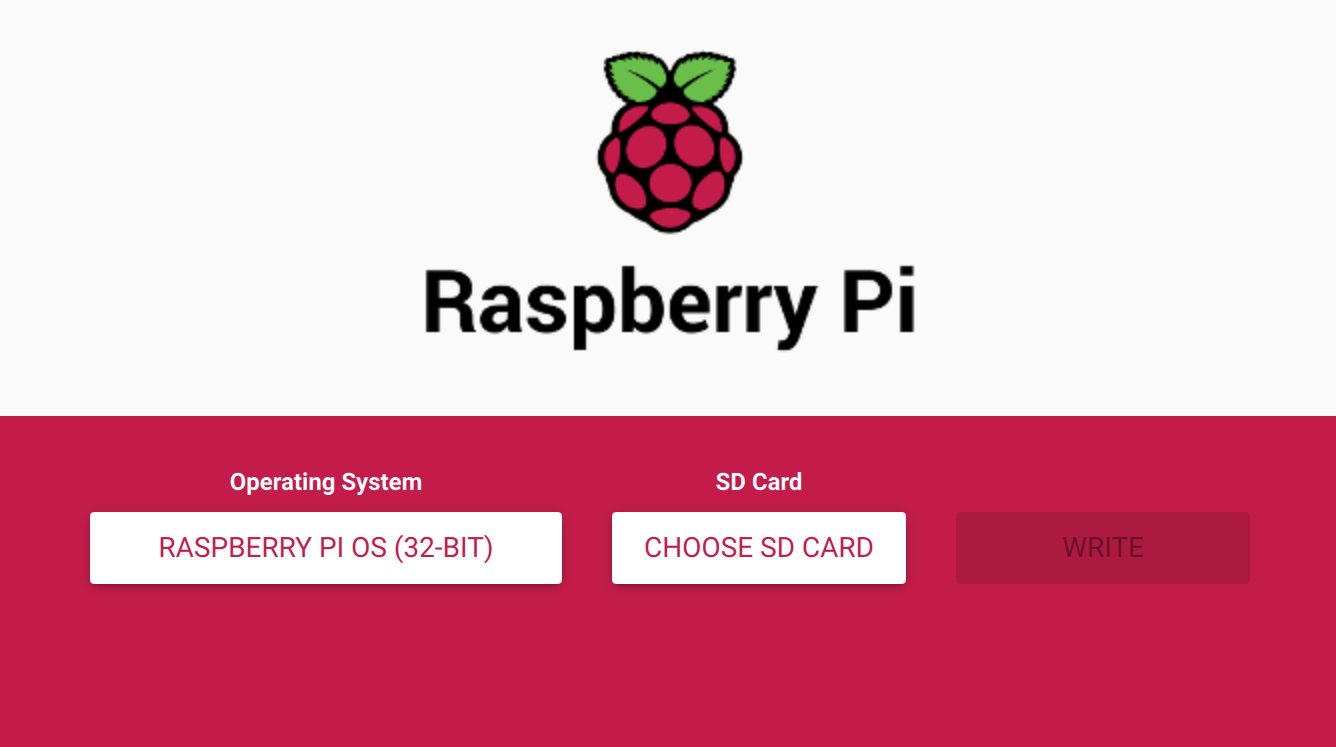
You will need a computer to burn the OS image onto the micro-SD card. I use an Ubuntu machine with Pi Imager:

Make sure to select the 32-Bit Raspberry Pi OS. Insert the micro-SD card and write the image.
One-Time Network Setup
Once you have written the OS to the micro-SD card, put the micro-SD card into the spare Raspberry Pi that does have a network adapter and a keyboard. You’ll want to connect to the Internet and install the following software:
Virtual Keyboard
You can consider this step optional if you plan on using a normal keyboard with the airgapped Pi Zero. However, I would recommend avoiding wireless keyboards due to the security concerns.
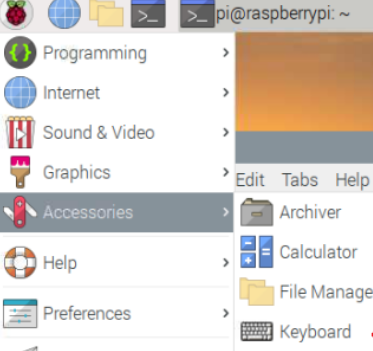
sudo apt install matchbox-keyboard
Once installed, the virtual keyboard will be in the Accessories menu, as shown,

Electrum
I recommend to install Electrum from the source and verify the package. At the time of this writing, this will look like,
sudo apt-get install python3-pyqt5 libsecp256k1-0 python3-cryptography
wget https://download.electrum.org/4.0.9/Electrum-4.0.9.tar.gz
wget https://download.electrum.org/4.0.9/Electrum-4.0.9.tar.gz.asc

wget https://raw.githubusercontent.com/spesmilo/electrum/master/pubkeys/ThomasV.asc
gpg --import ThomasV.asc

gpg --verify Electrum-4.0.9.tar.gz.asc
You should get the following output,
gpg: assuming signed data in 'Electrum-4.0.9.tar.gz'
gpg: Signature made Fri 18 Dec 2020 12:07:21 PM MST
gpg:                using RSA key 6694D8DE7BE8EE5631BED9502BD5824B7F9470E6
gpg: Good signature from "Thomas Voegtlin (https://electrum.org) <thomasv@electrum.org>" [unknown]
gpg:                 aka "ThomasV <thomasv1@gmx.de>" [unknown]
gpg:                 aka "Thomas Voegtlin <thomasv1@gmx.de>" [unknown]
gpg: WARNING: This key is not certified with a trusted signature!
gpg:          There is no indication that the signature belongs to the owner.
Primary key fingerprint: 6694 D8DE 7BE8 EE56 31BE  D950 2BD5 824B 7F94 70E6
Assuming things look good you can untar the package and rename it however you want,
tar -xvf Electrum-4.0.9.tar.gz
mv Electrum-4.0.9 Electrum
Shut down the Raspberry Pi and remove the micro-SD. This will be the very last time this micro-SD card should see the Internet.
Airgap the Pi Zero
Insert the micro-SD card into the Pi Zero, and physically tape over it with a tamper proof seal (such that it would be obvious if it was ever removed).
Depending on your level of paranoia, you’ll want to make sure that no data can get off your pi-zero except via QR code or pen and paper. This means that the moment you generate private keys, you’ll want to take precautions to never expose the device to a network or a USB thumb-drive.
I recommend attaching everything together (mouse, display, and the pi-zero) such that it looks like a Frankenstein computer. Use duct-tape if you have to. If you used a USB adapter that includes other USB ports, physically cover those with tamper proof seals. There are cases you can get for a pi-zero, I have no recommendations other than to make sure that you seal this thing such that no one can connect to it from any other device. Wrap it a faraday bag if you’re truly paranoid.
Using your DIY HWW
To start Electrum on the airgapped Pi Zero, simply use the “run_electrum” command from the console,
cd Electrum
./run_electrum
From here you’ll be using Electrum in offline mode, which will be useful for doing the following,
Create Wallets
You can create as many wallets as you like, and import public keys for multisig wallets through QR codes, as well as export public keys for managing receive addresses on a separate device.
For every wallet you do create, you’ll want to create a separate backup of the seed words. I recommend to use a metal backup (or a sturdy material that can withstand a house fire and still be legible).
Do not ever export the private keys or the wallet file. If you need to replace your micro-SD, simply create a new one and recover your wallets with the backup seeds. I would recommend to physically destroy the old micro-SD card. The whole point of this airgapped device is that the wallet is never exposed.
Sign Transactions
You can create transactions, and for multisig you’ll need to import an unsigned transaction into your airgapped Pi Zero HWW. To do so, open the wallet in question, and then under Tools, select Load Transaction, and then select From QR code. You can scan the transaction with your Pi Zero camera, and then click Sign.
You can export a signed transaction by displaying the QR code. Scan this onto any device with Internet access and broadcast the transaction.
Verify Receive Addresses
For security, it is recommended that you verify your receive addresses (especially in a multisig setup). To do so, simply open the wallet in question and select the Addresses tab. If you don’t see the addresses tab click View and then Show Addresses.
Make sure the addresses on this list match any corresponding watch-only wallets. If it is part of a multisig wallet, make sure all wallets in the group have the same receive addresses.