Previously, I discussed using GNU screen as a window manager.
I would like to access my screen session concurrently from multiple hosts (say, at work, at home, and even remotely on my phone). I would also like to define default screens specific to one host.
Default screens can be configured easily in the .screenrc in your home directory. To keep things simple I use a shared screenrc file, available in this github repo, this is shared across multiple environments that often have different uses (between home and work computers). Host specific screenrc commands are defined in a special .screenrc_local, that is loaded from the main .screenrc as follows,
source .screenrc_local
In order to load default screens each with a specific initial command, I use the “screen” and “stuff” commands in my .screenrc_local, for example,
## default screens
screen -t bash 0

screen -t cloud 1
stuff "cd cloud/cloudsource/trunk/roles/; pushd ../../branches/staging/roles; dirs -v^M"

screen -t ecr/ 2
stuff "cd /mnt/sartre-data/ecr/; ll^M"

## go back to the first screen
select 0

With this configuration any new session will have those initial screens.
Whatever is in the “stuff” command will be typed automatically into the screen session. Add “^M” to send a hard return to execute the “stuff” command.
To enable multiuser mode in new screen sessions, add the following in your .screenrc
# enable multiuser screen
multiuser on
To enable multiuser mode in an existing screen session, press Ctrl-A : and enter “multiuser on”, that is,
^A :multiuser on
A multiuser screen session can be joined by multiple connections concurrently. By default, only your user account can access the shared screen session. To join a multiuser session, use the following command from the shell,
$ screen -x sessionname
 If you don’t enter a sessionname, the most recent session will be joined. If you use “-xR” a new session will be created if a multiuser session did not exist.
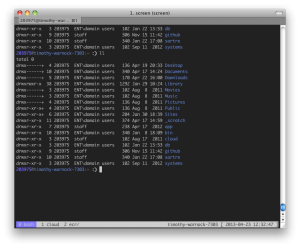
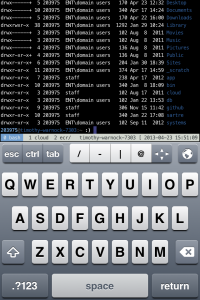
With this approach I can seamlessly switch to another computer or device, even in mid command.
Best of all, multiple connections can be active at the same time — so for example you can have the same screen session open at home and in the office, as well as on your phone (typing commands on your phone knowing they’re also showing on your home and work computer).
If you would like to allow other users to join your screen session, you would use the following commands, either in .screenrc or interactively using “Ctrl-A :”
acladd username
The other user can access this shared session using the following command,
$ screen -x owner/sessionname
Sharing a screen session with multiple users can get complicated; and because you’ll need to setuid root on the screen binary, it’s not a good security practice. However, within a trusted developer network on a shared host it’s a very good way to collaborate. If you do wish to allow multiple users to share a single screen session, you’ll need to run the following,
$ sudo chmod u+s `which screen`
$ sudo chmod 755 /var/run/screen
If you run into the following, “ERROR: Cannot open your terminal ‘/dev/pts/1’ – please check.” or something similar, this is likely because the current user did not login directly but instead performed a “su – username” and does not have access to the pts. An interesting hack I found here resolves this using the “script” command (which creates a new pts as the current user), that is,
script /dev/null
screen -x owner/sessionname
By default, all users will have full access to the shared session; able to type commands as the session owner. You can modify access by using “aclchg”, or remove access with “acldel”.
The “aclchg” command can apply to an entire session or to a specific window, e.g.,
## read only for entire session
aclchg username -w "#"

## full access to screen 0 only
aclchg username +rwx 0
As a simple shortcut, you can use aclchg to add a new user with specific (such as read-only) access.